How I built a model railroad in an apartment and still got my security back.
Friday, September 30, 2011
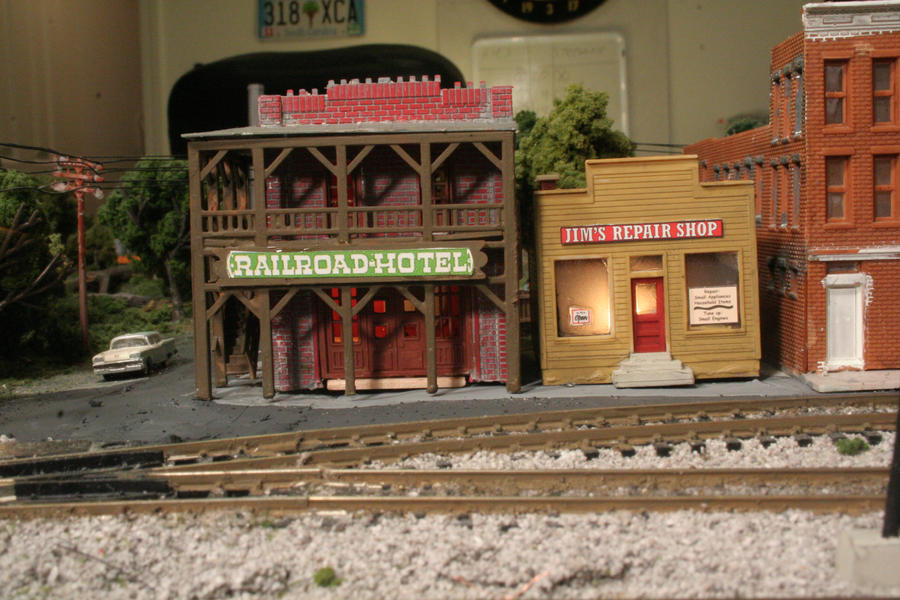
9/21/11 Finishsed Cornerstone's Jims Repair Shop kit
Walthers has discontinued this kit (as previously reported) but I was able to score one of eBay (seller my-esales). This kit is basially four walls and a roof. As such it goes together in about 30 seconds. The stock colors were pleasing to the eye but the finish was to plasticy looking for my taste. So I painted the steps Testors "Flat Light Aircraft Grey," the roof black and the walls Floquil "Depot Buff." Next I hit the building with a coat of weather wash, applied the decals and Dullcote. Since this building has light-colored walls, I painted the inside black to prevent the building from glowing.
9/19/11 Added new crossing signals
I decided I was getting tired of my toylike Bachmann crossing signals and I wanted more animation on the layout. So I added these NJ International crossing flashers. I haven't wired them up yet because I haven't yet received the required electrical do dad to make them flash. I have to say, they look much more realistic than their predecessors.
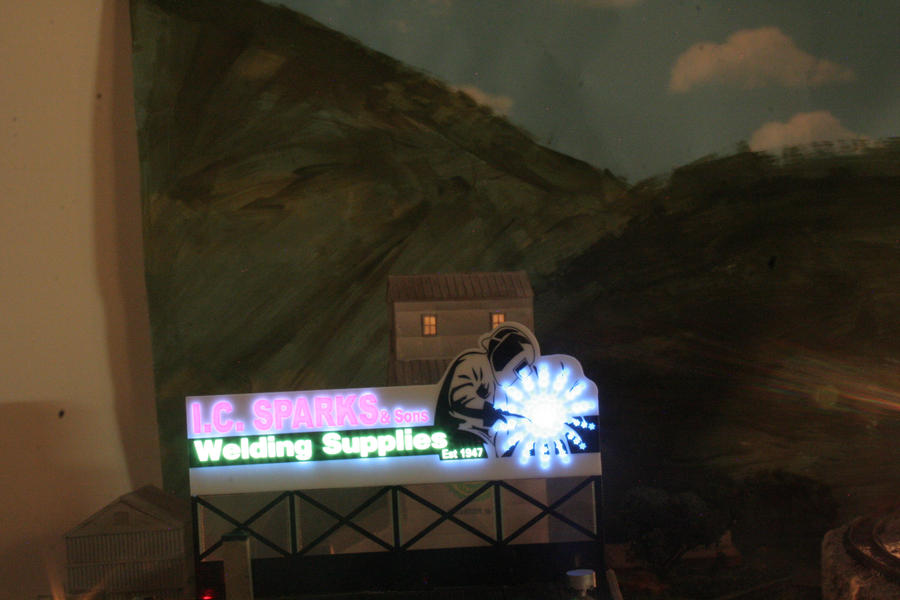
9/16/11 Added some neon lights
I went down to the local hobby shop in search of "something cool" to add to my layout and found this Light Works USA neon sign. Since the layout needed a reputable supplier of welding supplies, I snapped it up. This thing looks awesome and adds some cool animation to the layout. On the down side I did have to stuff a battery pack, PC Board and a bit of ribbon cable into the building but it was well worth it.
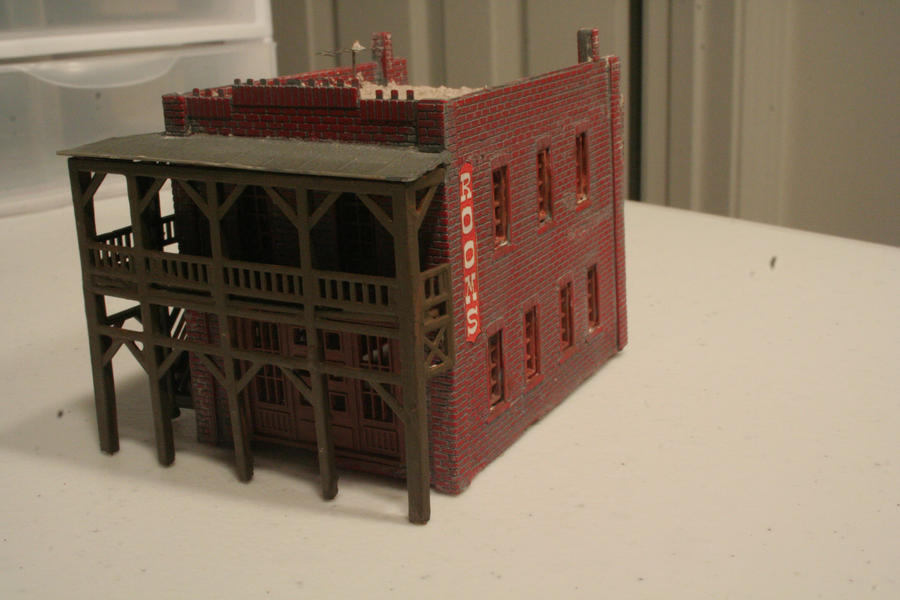
9/15/11Finished Model Power's Railroad Hotel kit
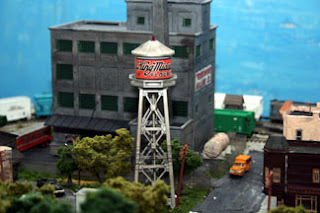
I decided that my Model Power "Oscar Mayer" building really didn't fit in with the rest of my buildings. I was too big and tall to be in a small town so I sought out s suitable replacement. I found MP's "Railroad Hotel" kit. Out of the box this thing is pretty lame so I decided to fix it up a bit. First thing I did was slather grey tempera paint all over the walls and then wipe most of it off. This filled in the mortar lines between the bricks. Next I painted the wooden walkway and supports Floquil "Rail Brown" and the windows and doors Floquil "Southern Freight Car Brown." When that was finished I applied a coat of weather wash to add a layer of dirt and grime to the building's exterior. After that I attached a Gold Medal Model's TV Antenna to the roof. For the roof, I glued some Woodland Scenics buff colored ballast to it to simulate a gravel roof. I finished up by spraying the whole thing with Testors Dulcote
The Oscar Mayer building was so wide that I could easily fit a second smaller building. I was hoping for a Cornerstone Jim's Repair Shop but according to Walthers, it's been discontinued.
The Oscar Mayer building was so wide that I could easily fit a second smaller building. I was hoping for a Cornerstone Jim's Repair Shop but according to Walthers, it's been discontinued.
9/13/11 Started Painting the Rails
I finally girded my loins and stared painting the rails. I always dreaded this but you know what? It's not all that difficult, just tedious. The trick is to completely cover the rail and the clean the top with a paper towel. For paint I used Floqil "Rail Brown." The color is a spot-on match! If I'd know it would have been this easy I'd have done way back in 2009 when there was no ballast or scenery in the way.
As you can see I also weathered the track by brushing on a coat of really dark weather wash down the center of the two rails.
As you can see I also weathered the track by brushing on a coat of really dark weather wash down the center of the two rails.
8/5/11 New Home
Well My girlfriend and I moved into a two-bedroom apartment. The second bedroom is now the train room. I have room for the layout, a small sofa and an honest-to-gosh work bench! This is living!
7/14/11 Blazing a new trail
Since hiking is another one of my hobbies, I decided to add a trail to the layout. I scrapped away the turf with flat blade screw driver and them sprinkled on some sifted dirt. I sprayed it down with scenic cement and called it done.
6/17/11 More Trees for Mt. Madness
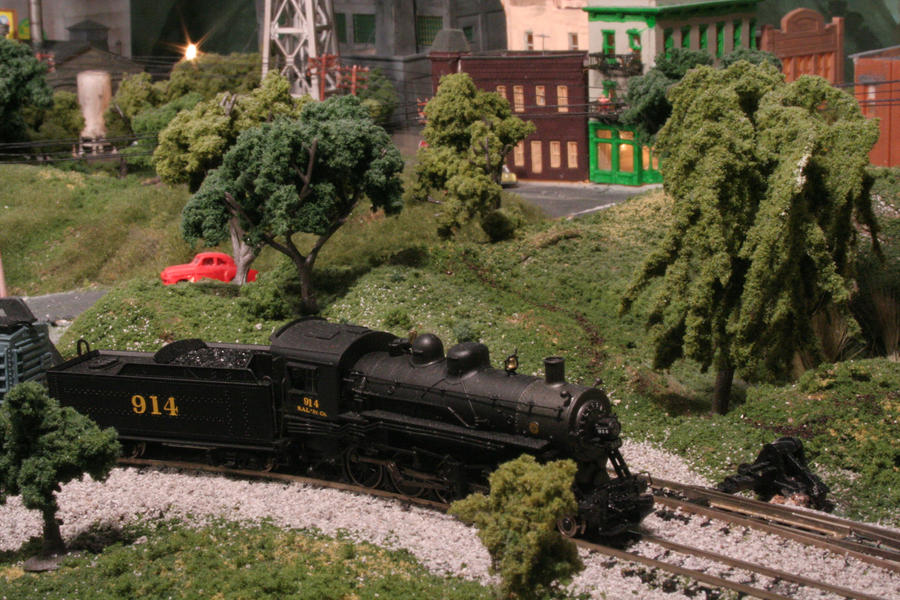
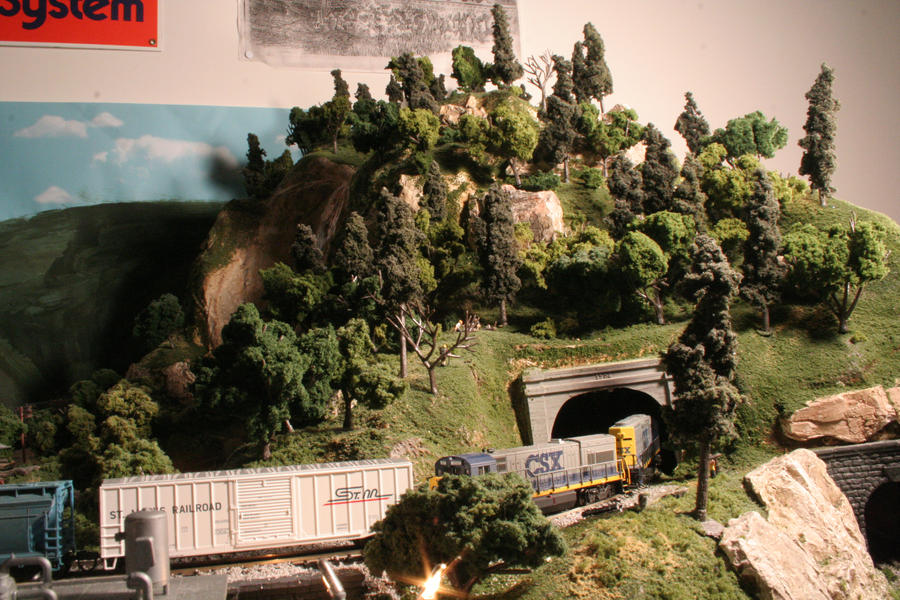
When I first put trees on the mountain, I stuck to Woodland Scenics pine trees. Then it dawned on me that in South Carolina, even the tallest mountains have deciduous trees all the way to the top. So I bought a WS tree kit and went to work.
Now assembling these trees isn't easy. In fact it's kind of a big pain in the ass. It involves taking flat plastic armatures and bending them into something that more or less looks like a tree. The you slather on the glue and dip it in a bag of "clump foliage (ground-up nerf in varying shades of green)." Yes it's a long, tedious, messy slog. To save myself some effort and enhance realism I added a few armatures sans foliage to simulate dead trees.
Complaints aside, I think Mount Madness turned out pretty good. It looks more like South Carolina and less like Oregon.
6/17/11 Built Some Bridge Abutments
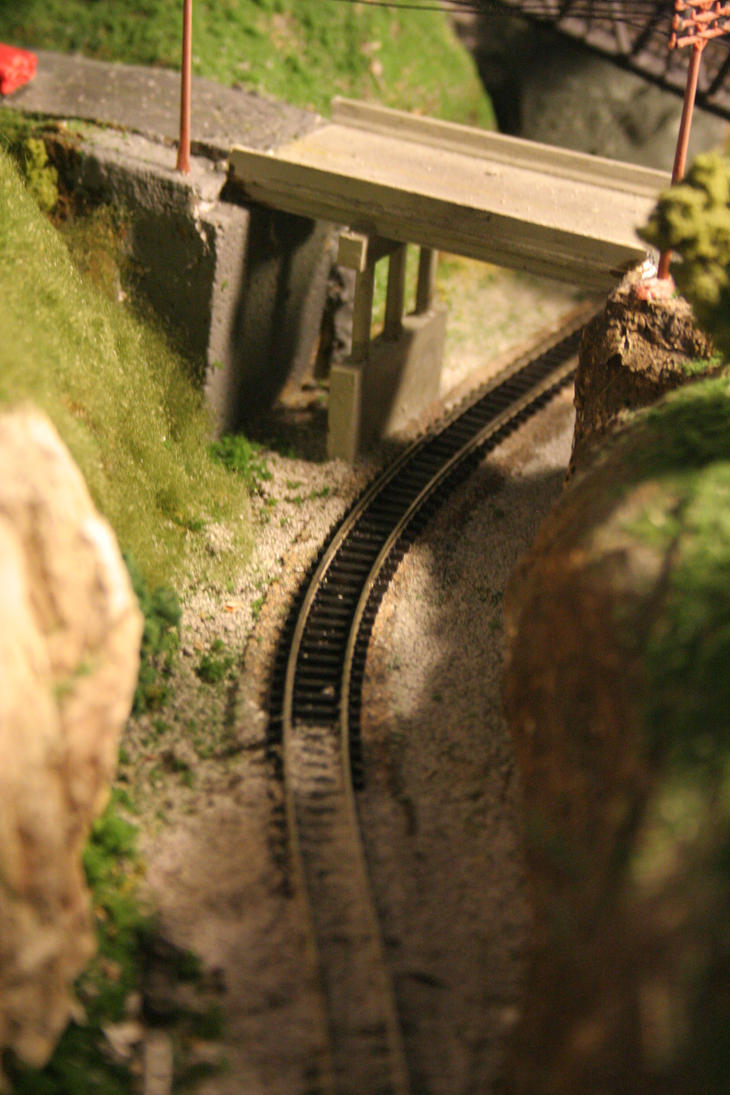
I've been revamping a few areas on my N Scale layout lately and one of my projects was redoing a pair of bridge abutments. When I was first doing the scenery I simply painted the end of the foam riser gray and called it done. I finally got tired of my half-assed effort and built these wooden ones out of some craft sticks and stripwood purchased from Michael's.
I glued everything together with Tightbond wood glue and stained it with Minwax "Special Walnut," which to me looks like creosote oil, the wood preservative used by railroads. I love how the stain really brings out the grain of the wood.
I glued everything together with Tightbond wood glue and stained it with Minwax "Special Walnut," which to me looks like creosote oil, the wood preservative used by railroads. I love how the stain really brings out the grain of the wood.
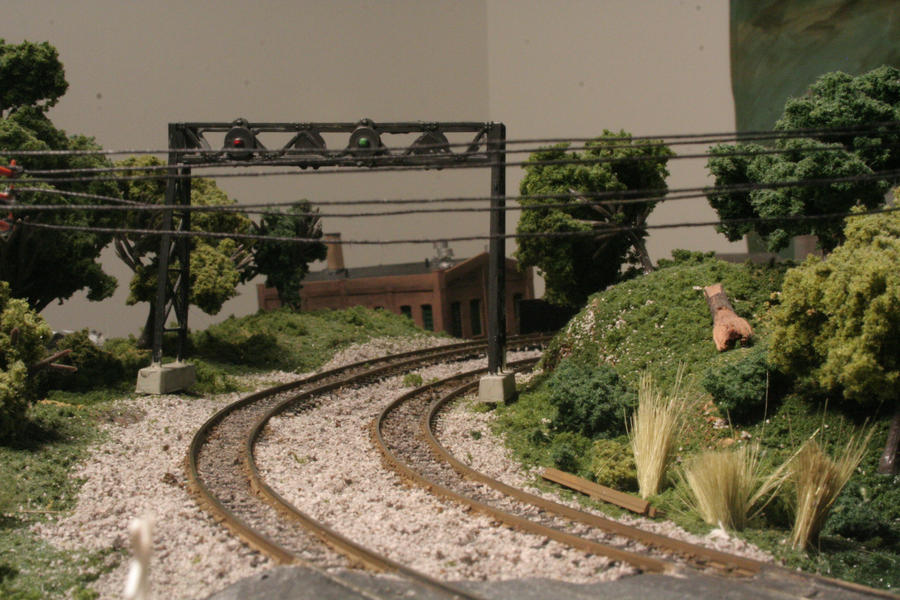
4/8/11 Custom Painted a Model Power Signal Bridge
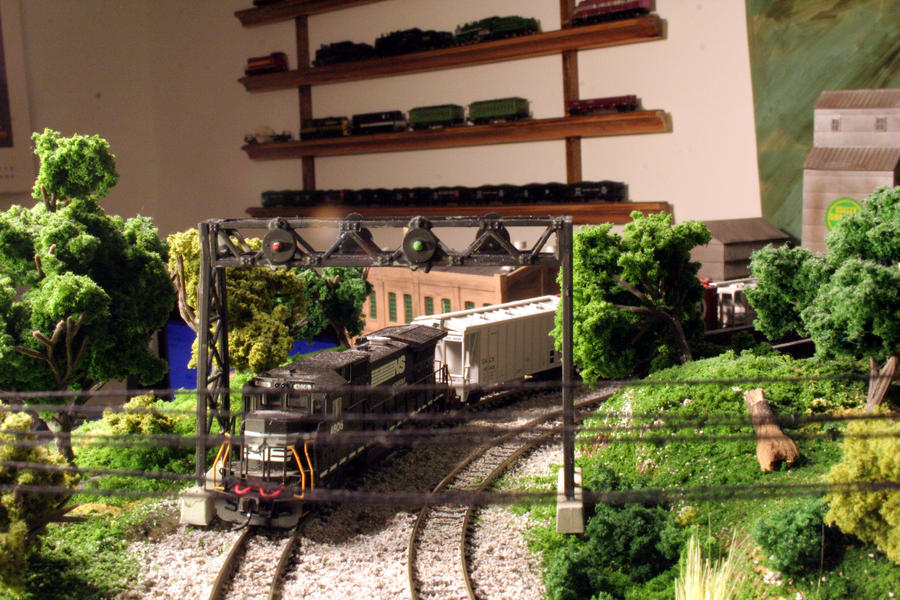
Here's a Model Power signal bridge I custom painted. As delivered [link] the bridge was metallic silver from stem to stern. Now I don;t know what planet the good people at Model Power inhabit but down here in South Carolina most of the surviving signal bridges of this design are painted black with concrete bases.
To start off, I painted the bases Testor's "Flat Light Aircraft Gray," which makes a nice concrete color. The I painted the rest of the structure black and then weather washed the bases. I finished off with a coat of Testors Dullcote.
To start off, I painted the bases Testor's "Flat Light Aircraft Gray," which makes a nice concrete color. The I painted the rest of the structure black and then weather washed the bases. I finished off with a coat of Testors Dullcote.
4/8/11 Added a new backdrop
I decided I was getting tired of my old layout backdrop (Some cardboard painted sky blue) and headed over to Micheal's to see if they didn't have something better. And boy did they ever! They had sky blue bulletin board paper with clouds printed on it. Well fait accompli! I snapped it up in heartbeat.
When I got some home I grabbed some black, green and brown tempera paints and mixed up to distinct earthy-green colors. I used these to paint several "layers" of distant mountains on the cloud paper.
I have to say I was doubting my ability to pull this off, but I really like the result. It really adds a sense of depth to the layout.
12/7/10 Aaarrgg!
Isn't it funny how little problems can snowball into catastrophes? Oh wait a minute, "funny" isn't the word I'm looking for I meant to say "infuriating." Case and point, I decided to run some trains whilst waiting for some laundry to dry and I noticed my Bachamnn 2-8-0 would stop dead at the same spot each and every lap, requiring a push forward for a few inches and then off it would go.
First I thought it was the engine. The 2-8-0 is probably the fussiest engine I own so I substituted an ultra-reliable Atlas GP40, hit the power and... nothing. Well WTF? Turns out a rail just plain got tired of conducting electricity. "No biggie," I thought. "I'll just crimp the rail joiner." So grabbed my needle nose pliers and had at it. I crimped that sucker on there good and... nothing. The section was still dead as Dillinger.
I now realized the only other options were either replace the joiner or solder the joint. Given the location of the joint all the scenery around it. I decided with the latter option and fired up my soldering gun. Bad idea. I managed to melt the plastic ties causing the rails to pop off and out of gauge. With the track ruined I now had to tear up and replace it. And as the late Billy Mays would say "But wait! There's more!"
The damaged track consisted of a pair of 19" radius curves, one of which ended in a plaster grade crossing. Not wanting to wreck said crossing I grabbed the Dremel and cut the offending section in two, tore out the bad track, custom fit a new piece and finally re-installed track. I still have to re-ballast though. Okay, maybe this was a bigger rant than it had to be but good lord all that for one lousy rail joiner. Kato Unitrack is starting to look better and better every day.
12/6/10 Track Work
I finally aquired one of those long steamers (A spectrum 2-8-0) that are recommended for finding all the trouble spots in your track work and boy did it do its job in a hurry! This thing would consistantly hop the rails on the same spot on the lower loop. When I first built it, I was kind of lazy and forced sectional track into places it didn't really want to go and ended up with a nasty kink. Said kink really limited what could be run down there. Well I finally decided I'd livid with it long enough and tore it out. Pictured is the piece of flex track I should have used the first time. Now I can run literally anything down there.
9/5/10 Finished the Extension
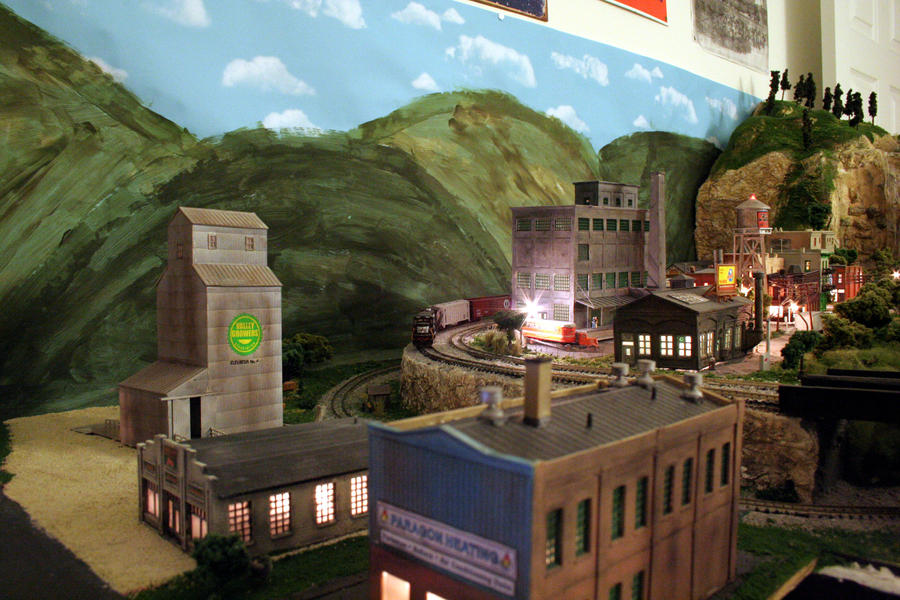
I accidentally lost the original photo so just ignore all that stuff you don't know about yet. I added the Valley Grower's Association, Stateline Farm Supply and Paragon heating to the layout. The ag buildings sit on a gravel parking lot and are served by a siding. Given the seasonal nature of grain elevators, I thought it would be a good idea to expand the scope of the business to include farm implements to allow for year-round use of the siding.
8/29/10 Finished Cornerstone's Valley Grower's Association Kit
This kit was blessedly simple to assemble. Basically each building is four walls and roof. I sprayed the two loading ramps on the elevator flat, light aircraft gray and everything else silver. I did run into an issue with the two decals on the elevator walls and damaged them a bit but from a great distance you really can't tell. For weathering, I coated all the buildings with light weatherwash and followed that up with chalks and dull coat.
8/28/10 De-grungeafied Stateline Farm Supply
As previously mentioned, I put way too dark a coat of weather wash on this building, leaving it almost black. So I got out my 600-grit automotive sandpaper and had at it. This took of most of the crud. The I wiped it down with 91% rubbing alcohol to finishes the job. I sprayed on a coat of Dull Coat and called it done. The building looks much better now. It's cleaner but still looks like it's seen better days.
Wednesday, September 28, 2011
8/19/10 Finished Cornerstone's Stateline Farm Supply
Well okay I didn't really "finish" this building as I ran out of Dullcote and neglected to pick up another can. This kit started off easy enough, I glued the four walls to the base and the cooperated by staying in place. But that's where the easy part ended. The front facade has all these practically microscopic little toppers to be glued on. Of course I managed to get tons of glue shmootz all over the place. Next I sprayed the building with a coat of Testors' "Flat light aircraft gray," which makes for a nice concrete color. Unfortunately some of the paint bubbled up. I wet sanded the bubbled paint and applied two coats of thick weather wash. That turned out to be overkill as the building now looks almost black. I may wet sand it some more to clean it up a bit.
8/16/10 Finished Cornerstones Paragon Heating
I finished my first building, Cornerstone's Paragon Heating. I've been wanting to use this one on a layout since PR&Y. All I can say is wow, what a pain in the ass this thing was to assemble! This is one of Cornerstone's "Modular" kits that can be built a variety of ways. Both side walls required 22, yes 22 individual pieces and that's not counting the windows! It took me several days to get the walls assembled and painted. Off course all those pieces left ample chances to get glue all over everything and I sure took advantage of every one of them. Assembly difficulty aside, there's just no covering up the modular nature of the structure. You have all these odd seems that one wouldn't find on a real building.
Painting helped hide some of the glue shmootz but for the rest of it, it was bring on the weathering. I started by lightly sanding the paint with 600 grit automotive sandpaper, followed by two layers of really heavy weather wash and the chalks and Dulcote. This is supposed to be Appalachia so I think the extra grunginess works. At any rate the next building is going to require a lot less sweat.
5/17/10 Done!...Or so I thought anyway
Well that’s it! I took care of the last minor detail, getting the buildings and vehicles glued down. It’s been nearly a year since I started.
Some Final Thoughts:
I can safely say this layout turned out far better than I’d ever hoped. Part of that is because I went the extra mile in the planning stages as opposed to making it up as I went along. I’m also glad I went out of the way to try new things such as chalk weathering, Realistic Water & Water Effects, WS Road System, casting rock formations and staining them. I’m also glad I spent the extra money on details, yes they cost a lot but they really enhanced the look of the layout.
Unlike PR&Y, which I was never really happy with, I don’t really have a whole laundry list of objections. In fact I think I pretty much nailed most of the items on my wish list. I can run three trains at a time, I have dramatic scenery with mountains and bridges and tunnels and waterfalls, a theme built upon industry and railroading and two mains-over-mains crossings. In fact this is the first time I've ever ended up with a layout I feel truly satisfied with and I may end up holding onto it for a while.
Regrets? Yeah, I have a few.
For starters, I was stupid to think only one set of feeder wires per main line would cut it. I ended up having to retrofit them after the fact, which is a huge pain in the ass. And while we’re on the subject of wiring, I really regret isolating the industrial sidings. This created a lot of extra work. And for what? I have yet to attempt any sort of switching maneuver. My idea of operating consists of letting the trains run around and around and around. The only thing I ever use the sidings for is to park a stray freight car or two. Next layout, I won’t bother with the extra wiring.
Also, I used foam-core board for my layout base despite the issues I had on PR&Y. It’s cheap and readily available at Hobby Lobby. And that’s about all it has going for it. It has the tensile strength of a graham cracker and warps at the very thought of painting it. True, the issues I had were very minor on the layout compared with PR&Y but after this layout, I swear off foam-core board forever.
And of course there's my ballast issues too.
Anyway I wrote the above a little over a year ago, think I was done. Boy was I ever wrong! I originally thought I would sell this layout and build a new one. But I kept finding new projects for this one. So yeah, far from done. The next thing I did was expand the lower level and add more industries.
4/17/10 Our great national nightmare is over, the industrial sidings are well and truly wired:
Boy am I ever glad to have this particular millstone removed from around my neck. Let me tell you about wiring in general. I don’t much care for it, in fact I kind of hate it. It’s tedious, boring and more often than not requires working in an uncomfortable position. The correct way to do this project would have been to install terminal joiners on the insulated rails for each siding. Unfortunately I didn’t do that. The two dead ends over by Red Wing Milling and Coverall paints were actauly pretty painless. All I did was solder a length of wire to a spare rail joiner and slide it onto the end of the insulated rail. The lower level siding by coverall literally took two seconds. The upper level was more of a challenge, requiring me to thread wires through two layers of foam board. To accomplish this, I punched a hole through each layer with a screwdriver. Then I took a longer and narrower screwdriver and taped the end of the wire to the tip of its blade. This allowed me to thread the wires rather easily.
I wired up both dead ends first and definitely saved the worst for last. The upper level passing siding required me to soldier a wire in situ. If it sounds like a total pain in the ass, that’s because it is! It was painful, but I got it done then wired all three siding to their respective toggle switches and ran screaming for the hills with my sanity barely intact.
4/12/10 A new building and more details
I decided that if the lower level industrial area was going to have a water tower then so should the upper. As luck would have it I came across one of those old Model Power ones with the blinky red light on top. I removed the base, weathered it and stuck on a decal from the Red Wing set to make it look like part of the flower mill.
I also installed my last Gold Medal Models kit, a fire escape for my DPM Corner Apothecary. As with all projects requiring CA, this one turned out to be another total pain in the ass but the results were well worth it.
Remember eight months ago when I though I had my ballast problem licked? Well it turns out I was wrong. I went to clean the track and discovered that none of the upper level ballast along the back of the layout was affixed. Now at the point of complete exasperation with this problem, I coughed up the money for some WS Scenic Cement, the stuff WS actually tells you to use on the stuff and it actually worked. Wow! But that's it for me and WS ballast; I'm never using it again. Not only was it a total pain to work with, it also just doesn't look too realistic. In fact it kind of looks like Bachmann EZ Track. It's too late to change now but next layout, I will most definitely find something more realistic.
3/14/10 installed a Security fence around Red Wing Milling
I ordered this etched brass chain-link fence kit from Gold Medal Models. It took two sets to enclose Red Wing milling. As supplied, the fence, the fence has little feet on each post. GMM also supplies a drilling jig to allow you too drill holes for said feet. I took one look at that and said “no way.” I bent each foot 90 degree, coated it with FTG and stuck the fence to the layout and called it done. It really enhances the scene.
While I was at it I also added some TV antennas from GMM to some of the town buildings.
2/28/10 Finished detailing the Depot
Bingo! My town has a name o! The town is now known as River Falls. I got the name of an adopt-a-highway sign I saw during the course of my daily driving. Now for what I actually did: First I thought the station platform was too wide. So I scored and snapped it in half. Next I added the water column from the corner stone kit. I weathered the building lightly as well. I think it looks quite a bit better. As you can see I picked up another coal burner for my fleet, a Model Power 4-4-0. I have to say the quality top-notch. Not what I’d expect from MP, that’s for sure. I also painted up some old-timey coaches for it to pull.
2/5/10 New structures and more detailing
With an impending snow storm threatening to keep me inside for a while, I ran down to the local hobby shop and bought a few things to keep me busy.
First up, it was Cornerstone’s “Shady Junction Structures. In this package you get a crossing shanty, a water tower and water column and a small shed. I decided to leave them in their stock colors and weather them heavily. First I slathered on the weather wash, followed by dullcote, then chalks and then one last sealer coat of dullcote.
I put the crossing shanty over by Red Wing Milling in the upper level industrial area. A small yard area like this would probably have some small structure for a switchman to reside in. I had to trim the base a bit in order for the thing to fit properly. First I tried the old “score and snap” trick with an exacto knife. My penitence for this method quickly waned so I grabbed my dremmel and had at it. I glued the building down with FTG and called it done.
I put the water tower and column down in the lower level industrial area since the lower loop in the only one of the three that my lone steam engine will run on. The shed also went on the lower level.
That’s about it for the shady junction structures but to quote Billy Mayes, “I’m not done yet.”
I also picked up the Cornerstone Modular “Storage Tanks” kit. What you get is a set of six storage tanks that you can use to compliment your industrial buildings. I painted mine with Testors white and weathered them heavily. I put a few at each industry.
I put one fence around the empty space over by red wing milling, which makes the town look a lot more credible. I covered the concrete with left-over ballast. Unfortunately Hobby Lobby didn’t have any details in N Scale so I decided to peak over the fence and see what HO had to offer. What I got was a pair of LP Gas tanks that add to the look of the scene. The streetlight in the photo is from Model Power, it’s one of three I put in. I put the other fence around the back yard behind the Oscar Meyer building to give the people barbequing some privacy. You can almost here “Them from a Summer Place” playing in the background.
1/6/10 replaced some ugly switch machines and added more detailing
After seven months of looking at those butt-ugly Atlas switch machines I decided to replace a few of them with Caboose Industries ground throws. These look a lot more prototypical than the stock machines but they are grossly out of scale. Also I could only use them on the switches on the front of the layout where they wouldn’t be located between the tracks. Anyway the three switches on the back of the layout are largely out of view so I’m not going to sweat it too much.
Ah Wilderness:
While I was at it, I added this Woodland Scenics figure pack. It looks like these folks have camped themselves out right above one of my tunnels
Ah Wilderness:
While I was at it, I added this Woodland Scenics figure pack. It looks like these folks have camped themselves out right above one of my tunnels
12/31/09 New Power At Long Last
With some extra Christmas money at my disposal, I decided to pick up a new engine. The local hobby shop actually had an Atlas H16-44 on hand so I picked it. Lo and behold, it had the same problem as the last one. Well that’s too big of a coincidence to be a coincidence. So I returned it and got this GE U23B instead. I know it’s an odd choice given the era this layout seems to be headed toward (1940-1960) but I already have on CSX engine on hand so I guess it’s not too out of place. This one runs like a charm too.
12/23/09 Added a New Building and Reconfigured the Town
I decided I didn't really like the way the town looked with the one street pretty much empty. I needed a long, narrow building and DPM's Corner Apothecary fit the bill perfectly. However it need some modification to fit the area. Namely I had to shorten it. That required slicing a quarter of an inch off one end with my Dremel. Not the most fun in the world but survivable. The same could be said of assembly. However, I think the only way the instructions could be more useless is to print them in Wingdings. and I've already complained about how hard painting these things is so I'll spare you that rant.
At any rate I think the town looks a bit more complete now.
12/17/09 More odds and ends
Well I got to thinking that Red Wing Milling’s smokestack would look great if it actually smoked. In that spirit I went down to the nearest hobby shop and procured a seuthe smoke unit and installed it. This required some careful dis-assembly but the end result was terrific. The smoke adds a nice bit of realism to the scene.
While I was at the hobby shop I also picked up this Woodland Scenics Vehicles Scene.
For my last trick I put some cornerstone Prebuilt track bumpers on my sidings. You don’t often find these in the real world, but on a model railroad, it’s always a good idea to have something keeping your trains from hitting the floor. Out of the box these things are kind of lame. A quick shot of weathwash however made all the difference.
What a complete pain in the ass this project turned out to be! I started out by placing the poles and then affixing black thread to them. Simple right? Wrong! At first I thought I could get away with simply wrapping the thread around the support arms but it quickly became apparent that some type of adhesive would be required. I chose CA Glue. This worked great for a while until I started getting the occasional pole on which the glue simply reused to adhere. It took two weeks but I finally got it done and I have to say the wires do look awesome.
As you can see, I only put two wires per arm instead of four. Given the frustration involved with this project I’m more than willing to give a nod to selective compression.
12/15/09 My Problem Child
I know this layout is supposed to depict the South Carolina up country but, growing up on Long Island, I have a certain affection for the old LI Double R. In that spirit, I order this Atlas LIRR Fairbanks-Morse H16-44. Let me tell you, there are cursed objects in this world and the afore-mentioned locomotive is one of them. First after patiently waiting the three days for the locomotive to ship, I get a package slip in my mailbox. Just my luck the post office isn’t open on the weekends and I have to go out of town on Monday. The next day arrives and there’s another slip waiting for me informing me my package is in the rental office. I get there literally two minutes after closing only to be told “it’s in there on the floor but there’s an alarm, we can’t go back and get it.” Annoying but nothing I can do. I get home early, get the engine, put it on the tracks and it ran for a few minutes then came to a dead stop. I gave it a nudge, nothing. Turned out one of it’s trucks is binding. That was it; I hit the ceiling! I now had a defective engine and no way to return it before my business trip.
At any rate after a week and a half I still don’t have a running locomotive.
As for my snail-like progress on the layout, like I said, I’ve been busy. But I have been slogging through the utility pole project as much as patience allows.
11/30/09 Yeah, I’m still alive
Boy do I have all kind of excuses for my recent layout building inactivity. First off, I had a FAM trip to Myrtle Beach for the better part of a week at the beginning of the month. Then I met a girl and went out with her a few times and then there was Thanksgiving. So yeah, not much time for trains. But I have made some small progress on installing the utility poles and wires. I’ll have some pics when it’s all done.
11/6/09 Let there be (even more) light!
I made another spur of the moment trips to Hobby Lobby today and once again found train stuff marked down. In that spirit I snapped up two packs of Model Power streetlights. One pack was Y-shaped double lights while the other was gooseneck lights. My initial reaction to the Y-shaped lights was “are they sure these are N Scale and not HO?” They’re up to the second floor of Coverall Paints but they are still a nice bit of detailing on the lower level. They went in without any real difficulty. I just punched a hole in the foam board, ran the wire and glued them down with FTG.
With that out of the way, I turned to the goosenecks. I put them on the upper level along the road that ruins along the back of the town. That’s when the real fun started. First I added length to the supplied wires. It’s much easier to do this at the workbench than in situ. Next it was the same procedure of punch hole, run wire, glue lamp. Now the one problem with this arrangement is the upper-level wiring is enclosed in a two-inch compartment. I had to fumble around and find the end of the wires in said compartment.
When I finally got them hooked up and tested them, they stayed lit for about two seconds, then darkness. My layout was hit with a blackout. It was obvious my MRC throttle pack wasn’t up to the task of powering all those lights. At first I thought about dividing the lights between two trainset power packs. However I quickly discarded that idea. In search of a real solution I decided to go poke through my G-Scale gear and my Aristocraft 4-amp power supply and controller. At first I hooked up just the power supply but the lights were “turn night into day birght.” So I took the controller and hooked the lights up to the DC terminals. I tell you this thing powers all my lights without breaking a sweat and I can dim them or shut them off completely now too.
Now That's a power supply:
Now it was at this point I noticed only two out of three streetlights were lit. I opened up the access panel and was horrified by what I saw. The insulation on the recalcitrant lamp’s wires was burnt off. There was also a scorch mark on the foam board. I decided to cut my loses and remove the lamp. I’ll gladly trade a lamp for not burning down the apartment building any day of the week.
11/5/09 More weathering and a repaint
I seemed to have developed a real penchant chalk weathering and as such decided that my AHM warehouse looked a little too pristine. I already hit this one with weather wash a while back but it faded. I applied a second coat and then the chalk. The result was years of industrial grunge in mere minutes.
While I was at it, I brushed chalks onto the parking lots around the upper level industrial area. Now I really should have quit while I was ahead. But then I got to notice my DPM Bruce’s Bakery. I decided I just couldn’t live with that crazy paint scheme any more. As such I got out my trustee Testors enamel and had at it. Believe painting it the first time was a total bitch. The second time? The description isn’t fit for print.
Before:
After:
11/3/09 Weathered Red Wing Milling again
Before:
After:
After my previous success with chalk weathering I decided to go ahead and do a more thorough job on Red Wing Milling. When I first put the kit together I gave it the usual coat of weatherwash, a shot of Dullcoat and called it day. Problem was I painted the building with Testors Enamel and weatherwash tends to bead up on enamel paint, leaving you with a bunch of black blotches. After deciding I’d had enough of my half-assed weathering job, I grabbed my chalks and had at it. What a difference!
Tuesday, September 27, 2011
11/1/09 weathered the trucks and started detailing the upper level industrial area
Well as tthreatened I went ahead and weathered my Mini Metals tractor-trailers. What an improvement! They went from toy-like to layout-worthy in no time flat. I started out with my usual plan of attack, brush on a coat of weather wash followed by Dullcote. Now about a year ago I’d bought some pastels with the idea of using them fro chalk weathering. I was nervous about it and just tossed them into a box and forgot about them. But I decided the usual method didn’t leave the trailers looking decrepit enough so I dug out the pastels and had at it. Basically, once you put on the first shot of Dullcote, your take you pastels) brown, black and white) and rub them on some paper to create dust. Brush said dust onto you model. You can go as light or heavy as you want depending on the degree of grunge you’re seeking. When you’re done spray it with another round of Dullcote. Don’t be surprised if that makes some of the pastel disappear however. I also found a way to place these trucks in which only one is visible at a time depending on the angle at which the layout is viewed.
While I was at Hobby Lobby yesterday I also picked up the “Dock Workers” scenic accents pack and place the figures over on the loading dock at Red Wing Milling. It only took a few guys to complete the scene and I was able to use some of the others over at the warehouse area. Also, I put the one black pickup in the warehouse parking lot and added a Model Power figure from Coverall Paints to complete the scene.
10/31/09 Started experimenting with vehicle placement
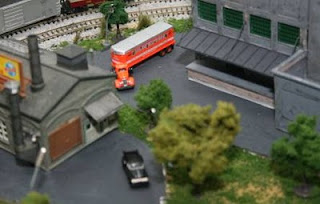
I acquired some Mini Metals vehicles today that I’d been eyeing for while. I bought a two-pack of 1953 Ford F-350s and a two-pack of tractor-trailer trucks. Well my original plan was to place the trailer up against the loading dock at Red Wing Milling. Too bad I made the parking lot too small. I test fitted the trailer and it looked really stupid, partially hanging over the grass. I ended up sticking the thing out in the parking lot. This gives the idea that the truck is pulling in (or out for that matter) and sidesteps to width problem. As you can see from the photo I stuck one of the pickups over by the warehouse. I think it looks all right there and will look better once I add people to the scene.That left me with the problem of each of these vehicles having an identical twin. The logical thing to do was put them on the lower level. This worked fine for the pickup. I stuck it next to the lower level switch tower and it fit right in with the scene. The other tractor-trailer on the other hand was more of a problem. The lower level industrial area consists of two buildings, Model Power’s Coverall Paints and a water tower. Unfortunately Coverall doesn’t have nearly enough space available for the truck. There’s just no way to park the thing. I’m not sweating that too much because Coverall does have a siding and can be a strictly rail-served industry. As for the truck, I’m playing around with placing it on the upper level.
I haven’t affixed these things yet because I want to play around with them further before placing them permanently. In addition they look just a little too shiny and new to be realistic so they will have to be weathered a bit first. Weathering should also help break up the “identical twin” problem too.
Subscribe to:
Posts (Atom)
